Spicy Cider Beer Braised Chicken Enchilada Tacos with Sweet Chili Apple-Pomegranate Salsa

IMG_8927

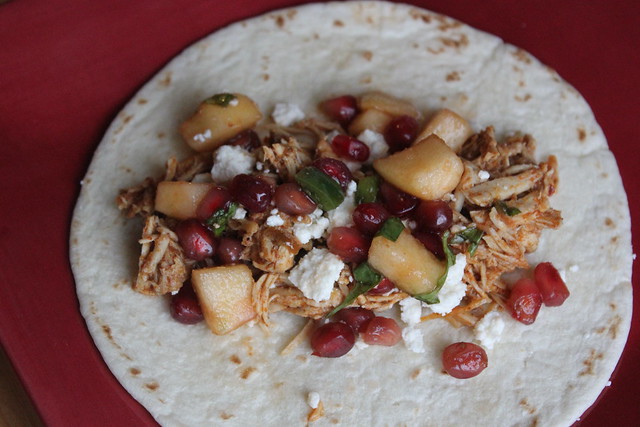
As I mentioned yesterday, our supper club’s January theme was alcohol.  I chose beer, thinking I would make some type of beer-braised chicken dish.  When I found this recipe I knew this was what I was going to be making.  Saturdays are busy with our morning farmer’s market trip, my son’s basketball game, and our weekly trip to the library.  Tieghan from Half Baked Harvest, where I found this recipe, gives directions on how to cook the chicken in the slow cooker.  So, of course, I went that route! The name’s a mouthful, but the dish is oh so flavorful!  It went really well with the black beans and whiskey glazed carrots that other supper club members had made.   Everyone enjoyed these tacos!  The flavors of the spicy chicken mixed with the sweet of the fruit salsa worked really well together.  This is not a dish that I’d think of making for the kids, based on the “spicy” and “sweet chili” in the title.  However, we had lots of leftover chicken and for lunch the next day both kids ate tacos without the salsa.

Spicy Beer Braised Chicken Enchilada Tacos with Sweet Chili Apple-Pomegranate Salsa
Recipe very slightly adapted from Half Baked Harvest

Ingredients:

  • 2 pounds boneless skinless chicken breasts
  • 2 tablespoons olive oil
  • 2 cloves garlic, minced or grated
  • 2 chipotle chilies in adobo, minced
  • 2 teaspoons chili powder
  • 2 teaspoons smoked paprika
  • 1 teaspoon cumin
  • 1 teaspoon brown sugar
  • 1/2 teaspoon cayenne, or more or less to taste
  • salt and peper
  • 1 (8 ounce) beer
  • 1/2 cup apple cider
  • 1/2 -3/4 cup enchilada sauce
  • 8 warmed flour or corn tortillas, for serving
  • sharp cheddar cheese and queso fresco for serving

For the Sweet Chili Apple-Pomegranate Salsa:

  • 2 apples, finely chopped (we used gala)
  • arils from one small pomegranate
  • 1 jalapeño, seeded and chopped
  • 1/4 cup fresh cilantro, chopped
  • juice from 1 lime
  • 2-4 tablespoons sweet thai chili sauce

Directions:

1. Add chicken through enchilada sauce into crockpot. Cover and cook on low for 6-8 hours or low 4-6 hours. Shred the chicken and return to the crockpot. If needed cook the chicken oh high for 30 minutes with the lid off to help thin the sauce.

2. Meanwhile, make the salsa. Add the chopped apple, pomegranate arils, jalapeño, cilantro, lime juice and sweet thai chili sauce to a bowl. Toss well to combine, taste and adjust if needed. Cover and store in the fridge until ready to serve.

3. Once the chicken is done cooking, remove it from the pot and shred with two forks. Meanwhile reduce the sauce that is left in the pot down to about 3/4 of a cup. Add the shredded chicken back to the sauce in the pot and toss. Next add the enchilada sauce and continue to cook about 2 minutes or until warmed through. If the sauce gets too thick, add a splash of apple cider.

4. To serve, add the shredded chicken to a warmed taco shell. Top with cheddar, avocado and then the apple salsa. Sprinkle with queso fresco and chopped cilantro.

1

Ben’s Cognac Risotto

IMG_8924

We belong to a Supper Club with two other couples.  Each month we rotate hosting duties and each of the six members cooks a dish that fits that particular month’s theme.  We end up eating six awesome dishes each time we meet!  January’s Supper Club meeting was at our house,  with the theme being “alcohol.”  Each person chose a different alcohol and had to make a dish using their booze of choice.  The Mr. chose cognac and made this risotto. Risotto is a particular favorite of ours that requires a bit of time and attention to make well.  The combination of flavors in this dish really complimented each other and tasted amazing.  Supper Club was a perfect opportunity to make this recipe since this is not a dish that the kids would enjoy.  They both really dislike mushrooms even though are exposed to them every time it’s in a meal at home. For us, though, the umami of the mushrooms brought an extra comforting dimension to the richness of the chewy rice and cheese. The flavor of the cognac wasn’t overpowering and was one that we usually wouldn’t think of adding. Alcohol isn’t on our regular ingredient list for food, but it should be. Also, we probably should have made more risotto. There was only one lonely serving in the fridge after everyone left. We would definitely make this again.

Ben’s Cognac Risotto
Recipe very slightly adapted from Foodnetwork.com, courtesy of The Gambaro Family

Ingredients:

  • 4 tablespoons butter
  • 15 small Portobello mushrooms– cleaned, trimmed and quartered
  • 2/3 cups cognac
  • 3/4 cup heavy cream
  • 7 cups vegetable stock (we used Better Than Bouillon, which we featured recently in this “Friday Favorites” post)
  • 1 tablespoon olive oil
  • 4 medium shallots, peeled and minced
  • 1 3/4 cups arborio rice
  • 1/3 cup freshly grated Parmigiano-Reggiano
  • Salt and freshly ground pepper

Directions:
Melt 2 tablespoons butter in a medium skillet over medium-high heat. Add the mushrooms and saute until golden brown, about 5 minutes. Add cognac, bring to a boil, and reduce the liquid by half, 3 to 4 minutes. Lower the heat to medium, add cream and simmer 5 minutes. Remove the skillet from the heat and set aside. Bring the stock to a simmer in a medium saucepan over medium heat.

Meanwhile, heat the remaining 2 tablespoons butter with the oil in a deep, heavy medium saucepan over medium heat. Add shallots and cook until soft, about 2 minutes. Add the rice and stir to coat with the butter and oil. Add simmering stock, 1/2 cup at a time, stirring constantly with a wooden spoon. Wait until liquid is almost completely absorbed before adding more. This process will take about 20 minutes. The rice should be just cooked and slightly chewy.

Stir in the mushroom mixture and cheese. Season, to taste, with salt and pepper and serve garnished with parsley.

1

World Nutella Day: Nutella-Stuffed Baked French Toast Casserole

IMG_9246

IMG_9250

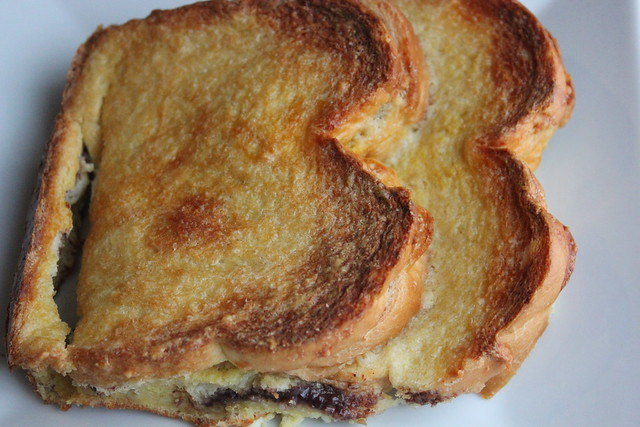
Today is World Nutella Day.  A day dedicated to the Italian sweetened hazelnut spread that we all love and enjoy.  It’s become a staple in our house where sometimes breakfast consists of a bagel with Nutella spread.  To celebrate this special day I am sharing Nutella-Stuffed Baked French Toast.  My kids LOVE breakfast food.  We were talking about giving things up for Lent and I reminded him that it has to be something that he really likes.  His response was breakfast!  No, I had to tell him, you can’t give up breakfast for Lent!  In the midst of our eating less meat, the kids have thus far been really great sports about it.  Even if I make a meal that they may not enjoy, they’ve been really great about eating some of it and giving it a try.  Each week I try to make a recipe that I know will be a definite hit with them.  I have lots of breakfast recipes bookmarked and know that breakfast for dinner will always be a win.  Well with this recipe, you mix French toast, already a big hit with the kids, with some Nutella?!!  To say they loved this would be an understatement.  A benefit of working at home is that I was able to prep this French toast in the morning and let it sit all day.  For busy families, you can prep this the night before and then bake in the oven the next day.  I call this a casserole since it’s cooked in a baking dish.  However, we cut pieces like those picture above to serve it.

Nutella-Stuffed Baked French Toast Casserole
Recipe adapted from the little kitchen

**Note:  You can pre-make this French toast the night before and bake in the oven the next day.

Ingredients:

  • 6 teaspoons butter, melted and cooled
  • 14 slices white bread
  • approximately 1/2 cup nutella hazelnut chocolate spread
  • 6 large eggs, beaten
  • 2/3 cup almond milk
  • 1 teaspoon pure vanilla extract
  • 1/2 cup Original Bisquick™ mix

Directions:

1.Preheat oven to 350°F. Spray a 9×13 inch baking dish with baking spray and set aside.
2. Spread Nutella on 7 slices of white bread and cover each with the remaining slices, so you have 7 sandwiches.3.  In a large bowl, mix the eggs and milk together. Add vanilla  extract and continue mixing. Mix in Bisquick® mix and melted butter, using a whisk if necessary to break up any clumps. Add sandwiches to the baking dish, overlapping so they fit in the pan. Pour Bisquick mixture over the bread, making sure all of the bread is covered. Allow to soak for 15 minutes (or overnight in the refrigerator).
4.  Bake  in the oven for 45 minutes. Allow to cool for 5 to 10 minutes before serving.
1

Tortellini Soup with Artichokes

IMG_9115

Soup. It’s what’s for dinner.  Nothing beats soup on a cold day, and here in New York we’ve been experiencing lots of cold weather!  In honor of National Homemade Soup Day, we are sharing this recipe for Tortellini Soup with Artichokes.  To be honest, the kids did not enjoy this soup.  We think there were too many ingredients in it that they didn’t like.  We were happy enough with them eating the tortellini and the accompanying bread.  Since the adults enjoyed it a lot, we thought it was worth sharing!

Tortellini Soup with Artichokes
Recipe adapted from foodiecrush

Ingredients:
6 cups vegetable broth
16 oz. package frozen tortellini
1/2 cup sundried tomatoes, chopped
15 oz. can chick peas, rinsed and drained
15 oz. can artichoke hearts, chopped
1/2 cup half-and-half
1/4 teaspoon red pepper flakes
2 cups baby spinach

Directions:
1.  Pour broth into a Dutch oven or stock pot and bring to a boil.

2.  Add the tortellini and sun dried tomatoes, cooking until the tortellini float to the top, approximately 3-4 minutes.

3.  Reduce the heat to low and add the chick peas through red pepper flakes, cooking for 2-3 minutes.

4.  Add the spinach and cook until wilted.

5

Carrot Cake Muffins

IMG_9140

Today is National Carrot Cake Day!  To celebrate, I am sharing some carrot cake muffins.  The Mr. says muffins are an excuse to eat cake for breakfast.  Well, so be it!  They are easy to make and easy to eat!  I have not had great success with carrots.  The kids constantly remind me of my big carrot soup fail from several years ago.  On rare occasions the kids will snack on carrot sticks with salad dressing.  For my daughter, who will eat just about anything, carrots rank high up on her least favorite vegetables list.  However,  they didn’t seem to mind eating these carrot cake muffins!  These were moist and flavorful.  I did not make the icing that the original recipe had called for, because then I’d have to call it a cupcake!  I did make a cinnamon sugar topping for the muffins but only sprinkled it on half of them, as seen in the picture.  I’m glad that I only sugared half of the muffins, as they were great without, and definitely did not need the extra sugar!

Carrot Cake Muffins
Recipe adapted from Chocolate, Chocolate and More Chocolate

Ingredients:
2 cups all purpose flour
1 1/2 teaspoons baking soda
1/2 teaspoon ground cinnamon
3/4 cup granulated sugar
2 large eggs, beaten
1/2 cup vegetable oil
1 teaspoon vanilla extract
2 cups shredded carrot

Optional:  Cinnamon Sugar Topping
Combine 2 Tbsp. sugar and 1/2 teaspoon ground cinnamon.

Directions:
1.  Preheat oven to 350 degrees F.  Grease or paper line 12 cup muffin tin.  In a large bowl combine flour through sugar.  Add in eggs, oil and vanilla, stirring until combined.  Fold in shredded carrots.  Sprinkle with cinnamon sugar topping, if desired.

2.  Fill muffin cups with 2/3 cup of batter.   Bake in pre-heated oven for 22-25 minutes (insert toothpick into the center of a muffin to check for doneness).   Let muffins cool in the pan for 10 minutes and then remove and place on cooling racks.


Sharing at Tasty Tuesday @ Lean Lena and Tasty Tuesday new mrs. adventures.

Macaroni and Cauliflower Cheese Bake


IMG_8908

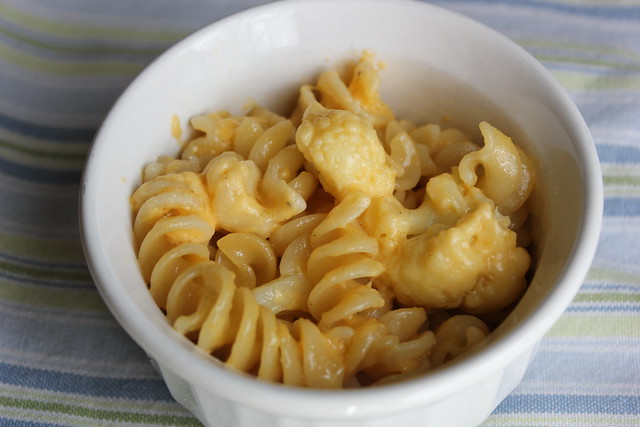
Winter is all about comfort food and nothing says comfort like some homemade mac and cheese.  As we try to eat less meat we are always looking for ways to incorporate more vegetables into our dishes.  Since mac and cheese is a favorite among the kids we knew they’d eat this.  We cooked the cauliflower to a point where it wasn’t too crunchy or too mushy.  The sour cream gave the dish an extra creaminess.  And we were correct, the kids did indeed eat all of their dinner!

Macaroni and Cauliflower Cheese Bake
Recipe adapted from The Art of Food adapted from Jamie Oliver’s Jamie’s Food Revolution

Ingredients:
1 head of cauliflower, chopped into bite-size pieces
8 oz. shredded cheddar
4 oz. grated parmesan cheese
1 pound macaroni
1 cup sour cream
salt and pepper to taste

Directions:

1. Grease 9×13 inch baking pan.

2. Cook macaroni according to package, adding cauliflower to the same pot of boiling water.

3. Place heat-proof bowl over the boiling pasta pot and add cheeses and sour cream.

4. Stir mixture until smooth and melted.

5. Season to taste with salt and pepper and remove bowl from pot, setting aside.

6. Drain macaroni and cauliflower in colander and reserve 1 cup of the cooking water.

7.  Pour pasta and cauliflower back into the pot.  Add cheese mixture stirring to combine.  Add reserved cooking water in small amounts as needed, if too thick.

8.  Pour mixture into greased baking pan.  Place pan under broiler until golden.


2

As Seen on Pinterest: Slow Cooker Loaded Potato Soup

Slow Cooker Loaded Potato Soup

With winter in full force here in New York, I have been looking for hearty soup and chili recipes.  Before long, warmer weather will be arriving and we won’t want to think of eating a warm bowl of anything!  While perusing Pinterest I saw this recipe and thought it sounded like something the family might eat.  The kids can be a bit picky when it comes to eating soup…..our son doesn’t really enjoy eating it, unless it’s the packaged ramen kind that we stopped buying.  So, it was a bit surprising when he ate two bowls of this soup.  My mouth dropped in surprise when he asked for seconds!  If you like baked potatoes with all the fixings, then this soup is for you!

Slow Cooker Loaded Potato Soup
Recipe slightly adapted from Cooking Classy

Ingredients:

  • 3 to 3 1/2 lbs russet potatoes, peeled and diced into 1/2-inch to 3/4-inch pieces (about 7 medium potatoes, 8 – 9 cups)
  • 1 medium yellow onion, finely diced
  • 3 (14.5 oz) cans low-sodium chicken or vegetable broth
  • 1 (12 oz) can evaporated milk
  • Salt and freshly ground black pepper, to taste
  • 1/3 cup butter
  • 1/3 cup all-purpose flour
  • 1/2 cup sour cream
  • 1 1/2 cups shredded cheddar cheese
  • 8 oz bacon, cooked and diced or crumbled
  • 4 green onions, diced

Directions:

1.  In. a 6 or 7-quart slow cooker, add potatoes, onion, vegetable broth, evaporated milk and season with salt and pepper to taste. Cover and cook on HIGH heat for 4 hours or LOW heat for 8 hours.

2. Ladle 2 cups of soup mixture from slow cooker into a liquid measuring cup and set aside. In a medium saucepan, melt butter over medium heat. Add flour and cook, stirring constantly, 2 minutes. While whisking, slowly pour 2 cups of reserved soup mixture from measuring cup into butter mixture (it will thicken quickly). Pour butter mixture into slow cooker and stir to blend. Use a potato masher to break down potatoes into smaller pieces or use an emulsion blender to puree. Cover and cook on HIGH heat until thickened, about 10 minutes. Turn off  slow cooker and stir in sour cream. Serve warm topped with cheddar, bacon and green onions.

2

Roasted Acorn Squash Stuffed with Sausage, Farro and Goat Cheese

IMG_8858

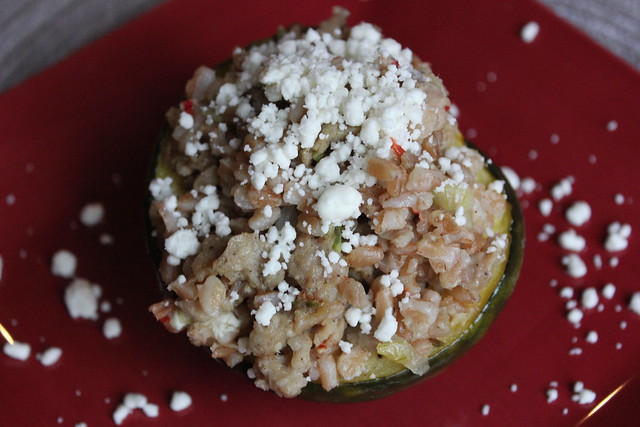
We have not cooked enough with squash this fall and winter and are now trying to catch up!  When I first saw found this recipe, I knew that I wanted to make it.  Only recently have I learned to love the nutty, chewiness of farro.  I was a bit hesitant because the only ingredient in this recipe that I knew both kids would eat for sure was the sausage.  Our son loves all kinds cheese.  Our daughter, though,  not so much.  However, we had gone to the farmer’s market and purchased a very large acorn squash.  As an afterthought, while doing the weekly grocery shopping, I ended up picking up another two small acorn squash so we could each have our own half, and have some left over.  This ended up working out well since we had a lot of filling.  Now, this recipe does take some preparation with the roasting of the squash and the preparation of the filling.  I recommend not attempting this on a busy weeknight.  We all ended up eating this meal.  We didn’t sprinkle additional goat cheese on top of our daughter’s serving and while she didn’t love the squash, she ate it.  Meanwhile, our son, the pickiest of eaters got a 1/2 of squash that was really sweet and liked it!  This was a hearty and filling meal.  While we ate just the squash, this can be served with a side salad to round out the meal.

Roasted Acorn Squash Stuffed with Sausage, Farro and Goat Cheese
Recipe adapted from The Hungry Goddess

Ingredients:
3 medium acorn squash
3 Tbsp.  butter
Salt and pepper
1/2 cup farro
2-4 Tbsp. olive oil
2 large garlic cloves
12 oz. chicken sausage (we used al fresco Sweet Italian)
4 0z. crumbled goat cheese

Directions:
1. Preheat oven to 400 degrees F.

2. Cut acorn squash in half, scooping out seeds with a spoon.

3. Rub the inside and outside of each squash with 1 Tbsp. of olive oil.

4. Place 1/2 Tbsp. of butter in the bottom of each squash and sprinkle with salt and pepper.

5. Roast squash in oven for approximately 30 minutes or until tender.

6.  Cook farro according to directions.

6.  While squash is roasting,  remove chicken sausage from casing and cook in large saute pan over medium heat until browned.  Once browned, remove from sausage pan and set aside, draining if necessary.  Add 1 Tbsp. olive oil to pan and add garlic sauteeing for approximately 5 minutes.  Add sausage and cooked farro to pan.  Sprinkle 3/4 of the crumbled goat cheese into the pan.  Season with salt and pepper to your liking.

7.  Once the squash have finished roasting, let them rest for 3-4 minutes.

8.  Spoon the sausage and farro mixture into each squash, sprinkling with reserved 1/4 of the crumbled goat cheese.


Chocolate Chip Cheesecake Brownies (Blondies)

IMG_8935

Today is National Blondie Brownie Day!   To celebrate we are sharing these Chocolate Chip Cheesecake Brownies a.k.a. “Blondies”  that we recently made.  A blondie is basically a brownie without the cocoa.  In this dessert mash-up of sorts, a chocolate chip cookie bar is mixed with a cheesecake layer.  Our kids enjoy almost all treats and of course loved these bars.  We adults concluded that as tasty as these bars were, we prefer to eat our cookies and our cheesecake separately.  Do you like dessert mash-ups?

Chocolate Chip Cheesecake Brownies
recipe slightly adapted from allrecipes.com courtesy of Barb W.

Ingredients:

For the blondie:
1 cup shortening
1 cup brown sugar
1/2 cup white sugar
1 teaspoon vanilla extract
3 eggs
2 cups all-purpose flour
1 teaspoon baking soda
1
/2 teaspoon salt
1 cup semisweet chocolate chips

For the cheesecake:
2 (8 ounce) packages cream cheese
1/4 cup white sugar
2 eggs

Directions:

  1. Preheat the oven to 350 degrees F (175 degrees C). Grease a 9×13 inch pan.
  2. In a large bowl, cream together shortening, brown sugar, and 1/2 cup white sugar. Beat in the 3 eggs one at a time, then stir in the vanilla. Combine the flour, baking soda, and salt; blend into the sugar mixture. Stir in chocolate chips, and set aside.
  3. In a separate bowl, mix together the cream cheese and 1/4 cup white sugar. Mix in the 2 remaining eggs.
  4. Spread 1/2 of chocolate chip dough in bottom of the prepared pan. Pour cream cheese batter on top of dough. Drop pieces of the remaining chocolate chip batter over filling. Don’t worry if there are gaps; the batter will spread.
  5. Bake for 45 minutes in preheated oven, or until lightly browned on the top. Let the brownies cool in the pan before cutting into bars.


2

Indian Curried Potato Wraps


IMG_8820

I have owned the Moosewood Restaurant New Classics cookbook for what seems like forever.   Back in college, at Cornell University, I ate at the famous Moosewood Restaurant only once.  If only I wasn’t a poor college student back then and had taken advantage of this amazing restaurant when I had the chance!  In our quest to eat less meat, I recently dusted this cookbook off the shelf.  In perusing the recipes, these potato wraps caught my eye.  My kids like potatoes and I figured they would enjoy these.  These were easy to make and so flavorful.  While we rarely have repeat meals in our house, these will be making an appearance again!

Indian Curried Potato Wraps
Adapted from cookbook Moosewood Restaurant New Classics

Ingredients:

 Directions:

1. Preheat the oven to 350 degrees F. Lightly oil a baking dish (we used a 9X13′ dish).

2. Place the potatoes and salt in a small pot with water to cover and bring to a boil. Reduce the heat, cover, and cook for about 10 minutes, until tender. When the potatoes are tender, drain and mash them with the cream cheese, and set aside.

3. Meanwhile, warm the oil in a saucepan, and saute the onions and garlic on medium heat for about 10 minutes, until translucent. Add the turmeric and cayenne and cook for 1-2 minutes, stirring constantly. Add the peas and tomatoes, cover, and cook on low heat just long enough to heat through. Stir the cooked vegetables and the lemon juice into the mashed potatoes. Add salt to taste.

4. Place a generous 1/3 cup of the filling at the bottom of each wrap and roll it up. Place the wraps seam side down in the prepared baking dish, cover with aluminum foil, and bake for 10-15 minutes, until hot.