1

Sweet and Spicy Popcorn

IMG_8872

Today is National Popcorn Day.  Our family loves popcorn!  We always have at least one box of microwave popcorn on hand for movie nights.  In our attempt to eat healthier, we have been trying to buy non-GMO, natural popcorn with no butter or flavoring and possibly just some salt added. To help flavor the popcorn, we’ve been on the lookout for recipes that allow us to add our own flavoring.  We saw this recipe for Sweet and Spicy Popcorn in Geoffrey Zakarian’s new cookbook My Perfect Pantry* and thought we’d try it out.  The kids didn’t enjoy it that much and luckily, we didn’t flavor all of the popcorn, so that they could have some without the seasoning on it.  We thought it added nice flavor to the company and we could taste the spicy and sweet.  The “spicy” was not overwhelming at all and the seasoning ratios of can be adjusted based on your spice tolerance/preference.

Sweet and Spicy Popcorn
Recipe slightly adapted from coobook My Perfect Pantry by Geoffrey Zakarian

Ingredients:
1 bag of natural (no butter) microwave popcorn
4 Tablespoons unsalted butter
1/4 teaspoon cayenne
1/2 teaspoon five spice powder
1/2 teaspoon paprika
2 teaspoons light brown sugar
kosher salt

Directions:

1. Microwave popcorn and put into large bowl.

2. In a small saucepan, melt the butter over low heat. Once melted, add the spices, cooking until fragrant, approximately one minute. Stir in the sugar until it dissolves.

3. Drizzle the spiced butter over the popcorn. Sprinkle with salt and toss well to mix.

We ended up having leftover popcorn that we stored in a sealed container for two days.

*We received My Perfect Pantry by Geoffrey Zakarian from Blogging for Books for a review.

Republic Restaurant (New York City)

IMG_8742

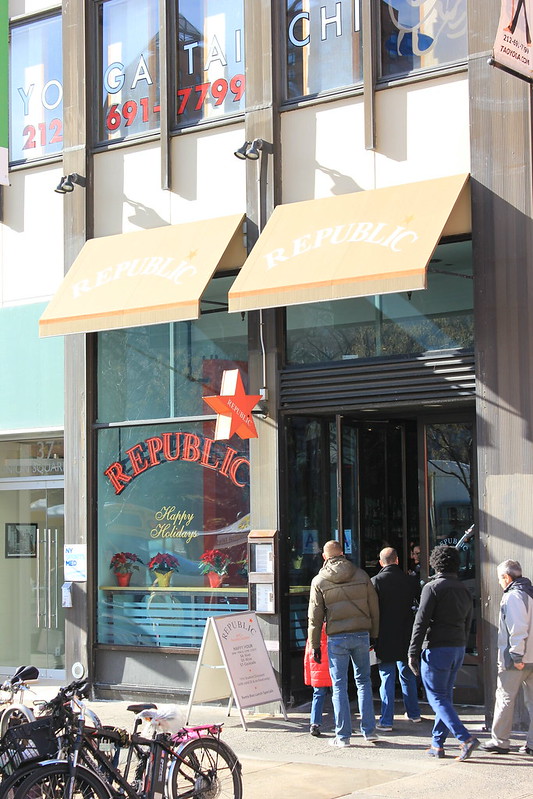
On a recent trip to New York City, we had to revise our lunch plan, when eating at Eataly was not a viable option.  See this post for details.  We were with the Mr.’s brother, who lives in New York City and suggested that we go to Republic.  He frequents the place and thought that we would enjoy it.  The restaurant is located in Union Square, convenient to the subway.  When you enter the restaurant, there are a few tables in the front and a long bar to the left.  The majority of the eating area is in the rear of the restaurant space and consists of long picnic style tables and benches.  It is likely that you will be sharing your table with another party.

Republic can best be described as an Asian Fusion restaurant.  They serve small dishes including dumplings, green papaya-mango salad,  and crispy tofu.  They serve many different varieties of broth noodles, which many people were eating, including spicy beef, curry chicken, lime chicken, and spicy seafood.  These small dishes range in price from $5 to $8.  Republic serves a variety of noodle dishes as well including pad thai, glass noodles, and peanut noodle salad.  Plus, they serve rice dishes including grilled chicken pesto over black rice, seared marinated salmon over curried rice with raisins, and chicken and mushrooms with broken rice and Asian vegetables.  These main dishes range between $12 and $15.  We visited on a weekday during lunch time and were able to take advantage of their special lunch bento boxes.  The Mr., the Mrs. and the kids each chose a different bento box, so we were able to sample three out of the five that they offer.  Each came with three different things so it was great that we got to try a variety of their menu items.   The Mr.’s brother ordered the Sauteed Curry Chicken, which he had before and enjoyed.  There is a small children’s menu that we didn’t really spend too much time looking at.  We figured the kids would get more food and variety by sharing an adult bento box.  Overall, we enjoyed everything that we ate.  The kids especially loved the sautéed mini dumplings and the peanut noodles.  The Mrs. really enjoyed the glass noodles and the Asian chopped veggie salad.

IMG_0448[1] The kids shared this!

 IMG_0449[1] The Mrs.  had this Vegetarian bento box

They have a large non-alcoholic specialty beverage menu  as well as a full bar menu including a selection of sakes and Asian beers. While the Mr. opted for a diet Coke, the Mrs. tried the non-alcoholic Asian Basil Lemonade and the kids had a Coconut Lime Cooler and a Pineapple Coconut Cooler.  The drinks weren’t too pricey at $4 each.

IMG_0452[1]  Asian Basil Lemonade 

    IMG_0450[1]  Coconut Lime Cooler


We had already eaten gelato before coming here for lunch, so we skipped dessert.  The dessert menu didn’t look that interesting with a couple of ice cream flavors (green tea and black sesame) sorbet, coconut tapioca and taro-coconut cake.  After lunch we strolled the Union Square farmer’s market, located right across the street from the restaurant.

We were very happy with our lunch at Republic.  While we, as a rule, tend not to frequent the same restaurants twice in New York City, we would recommend this for a family-friendly lunch or dinner.

19

Leftover Mashed Potato Gnocchi


IMG_0454[1]

We hate wasting food and are getting better about using up leftovers.  When we ended up with a ton of leftover mashed potatoes after a family gathering, an aunt suggested that we make gnocchi.  We have made ricotta gnocchi before, but had never tried making them with leftover mashed potatoes.  We found this recipe and realized how easy it was!  After cooking the gnocchi in the water, we sautéed them in some butter until they turned golden brown.  Sprinkled with some parmesan at the end, these were soft, pillowy bites of deliciousness that we all gobbled up!

Leftover Mashed Potato Gnocchi
Recipe adapted from Food & Whine

Ingredients:
2 cups mashed potatoes
1 cup flour (approx)
1 egg
1T butter
1T olive oil
salt and pepper to taste

Directions:
Combine mashed potatoes, flour and egg in a large bowl until it forms a ball of dough. Add more flour if dough is sticky. Turn dough out onto a well-floured surface and divide into 3 sections. Roll sections into long snakes with about a 3/4″ diameter. Cut each snake into 1″ pieces. Take a fork and press down on the tops of each piece to create ridges.  Place gnocchi one at a time into a large pot of boiling water until they rise to the top. Remove from water. Cook with  butter/oil in a large fry pan until browned.  Serve with your favorite pasta sauce or simply with some shredded parmesan cheese.


As Seen on Pinterest: Mocha Snickerdoodles

Mocha Snickerdoodles

Everyone loves cookies, right?!!  I’m not much of a baker, but after muffins, cookies are my favorite thing to bake. I can stick the cookies in the freezer and pull a couple out when I’m in the mood for something sweet.  I love anything mocha and these Mocha Snickerdoodles were a winner!  The combination of chocolate, coffee and hint of cinnamon was spot on!  The original pin I found here was for Espresso Snickerdoodles.  To make these cookies more kid-friendly, and not have my children hyped up on caffeine, I used decaf coffee granules.  With the exception of the hour the dough needs to chill, these cookies were really quick and easy to make.  These were moist, chocolatey cookies with a hint of coffee flavor that we all liked. The recipe made about 36, which was way too many for us.  I was feeling generous when I made these and sent some in with my husband so his co-workers could enjoy them as well!

Mocha Snickerdoodles
Slightly adapted from recipe found at Cupcakes and Kale Chips from guest blogger Tanya from Lemons for Lulu

Ingredients:

  • 3 tablespoons water
  • 2 tablespoons decaffeinated coffee granules
  • ½ cup butter softened
  • ¾ cup granulated sugar
  • ¾ cup brown sugar
  • 1 teaspoon cream of tartar
  • ½ teaspoon baking soda
  • ½ teaspoon salt
  • 2 eggs
  • 2 teaspoons vanilla
  • ½ cup cocoa powder
  • 2 ¼ cup flour
  • ¼ cup sugar
  • 2 teaspoons cinnamon
 Instructions:
  • In a small bowl, combine water and decaffeinated coffee granules and stir until dissolved.
  • In a mixing bowl, beat butter and sugars together until creamy. Stir in cream of tartar, baking soda and salt. Add eggs one at a time. Add vanilla and coffee mixture. Slowly beat in cocoa powder and flour.
  • Cover and chill dough for at least one hour or until easy to handle.
  • Preheat oven to 350°F. Stir together sugar and cinnamon in a small bowl.
  • Shape dough into 1 ¼ inch balls, roll in sugar mixture and place onto baking sheets.
  • Bake for 10-12 minutes or until edges are set.
  • Let cookies stand for 1 minute on baking sheet before removing to a wire rack to cool.
2

Creamy Parsnip Soup

IMG_8833

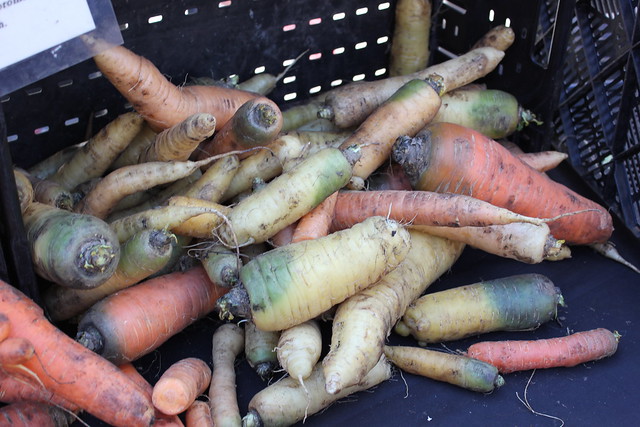
January has a wealth of month long food related celebrations including being National Soup Month.  Soup is perfect for the cold winter days we’ve been experiencing in New York recently. In honor of National Soup Month, I made a Creamy Parsnip Soup.   Parsnips are cream colored root vegetables that are closely related to carrots. They have a sweet, nutty flavor and are high in vitamins, minerals and dietary fiber.  Parsnips, like other root vegetables, are in their peak season Fall through Spring.  We rarely cook with parsnips and the kids did not remember ever trying them, when we told them we were having Creamy Parsnip Soup.  The below recipe uses parsnips, apples, potato and leeks, all of which are in peak season, which makes this a seasonally appropriate soup.  The apples and parsnips give the soup a sweet flavor.  While the kids didn’t love this soup, they both finished their serving.  The adults thought this was tasty.  We served this soup with Italian Herb Muffins to round out the meal.

Creamy Parsnip Soup
Recipe slightly adapted from Every Day Food, November 2005

Ingredients:
2 tablespoons butter
1 pound prepared sliced leeks (2 cups)
1 pound parsnips, trimmed, peeled, and cut crosswise into 1-inch pieces
2 apples, peeled, cored, and cut into 1-inch pieces
1 medium baking potato (about 1/2 pound), peeled and cut into 1-inch pieces
1 can (14.5 ounces) reduced sodium chicken broth
1/2 cup heavy cream
Salt and pepper

Directions:
1.Heat butter in a large pot over medium heat. Add the leeks and cook, stirring, 5 minutes. Remove 1/2 cup to garnish soup.

2.Add parsnips, apples, potato, broth, and 4 cups water. Bring to a boil; reduce heat and simmer, partially covered, until vegetables are tender, 20 to 25 minutes.

3.Use a stick blender to puree the soup until smooth. If you don’t have a stick blender, working in batches, puree soup in a blender until smooth and return to the pot. Stir in cream. Season with salt and pepper. Serve with Leek Garnish.

2

Gelato in Eataly (New York City)

IMG_8730

We took a recent trip down to New York City to see the tree in Rockefeller Center.  After seeing the tree, taking the mandatory photos, and visiting the Nintendo Store, we took a trip down to Eataly.  We had never been and I had heard so much about it.

According to their website, Eataly is “an original “marketplace” model inviting consumers to be active participants in an innovative food and beverage experience where they shop, taste and savor high quality traditional Italian food products and beverages along with local produce and artisanal products; a multifunctional marketplace that includes a premier retail center for Italian delicacies and wine, a culinary educational center, and a diverse slate of seven boutique eateries.” The 50,000 square foot entity opened in 2010 and is owned by Mario Batali, Lidia Bastianich and Joe Bastianich.

It is an Italian food lover’s dream.  As soon as you walk through the doors your senses are bombarded with various sights, sounds and smells. And yes, there are plenty of crowds in Eataly…especially over the holiday break.  From our understanding, if you were interested in eating fish, you would go to the fish area and try to get a table at Il Pesce.  If you wanted, you could stand and nibble on wine and cheese in La Piazza.  They cook with fresh ingredients that they sell in the marketplace.  You can also purchase most of the food products to take home with you, including one of the 200 different types of cheese and over 30 types of baked bread.  We saw cooked lobster pieces in a plastic take-out container that were going for $70/lb.

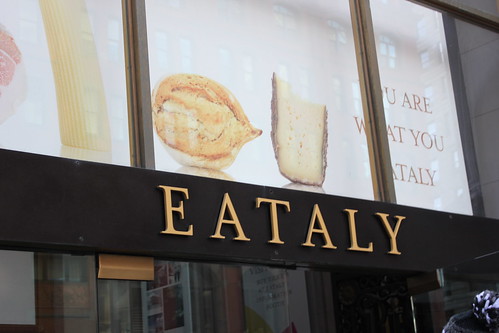
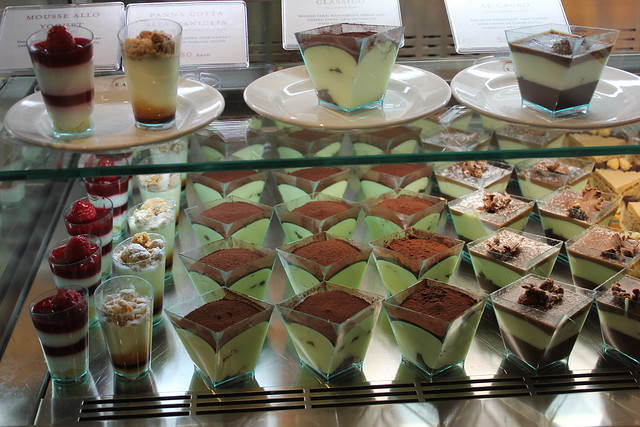
As I mentioned, the place was super crowded.  We didn’t get to see them making homemade mozzarella, or hand-made pasta.  We didn’t get to see them rolling out the dough at the bakery.  These are things that the kids would have enjoyed seeing.  We found the demarcations of one eating area from another weren’t very clear, and there were people everywhere. We weren’t going to be able to get a table at any of the seven restaurants without a huge wait time.  With two young children and no clear waiting areas we decided to skip eating lunch there.  Unfortunately, because it was so crowded, you couldn’t really stop and just take it all in.  The below pastry shots were taken on the fly as we were pushed along with the crowds.  But you can’t leave Eataly without some type of treat!
IMG_8735
We passed bakery cases showcasing all kinds of delectable looking treats but decided on gelato.  My husband and I honeymooned in Italy and have fond memories of gelato.
IMG_8736
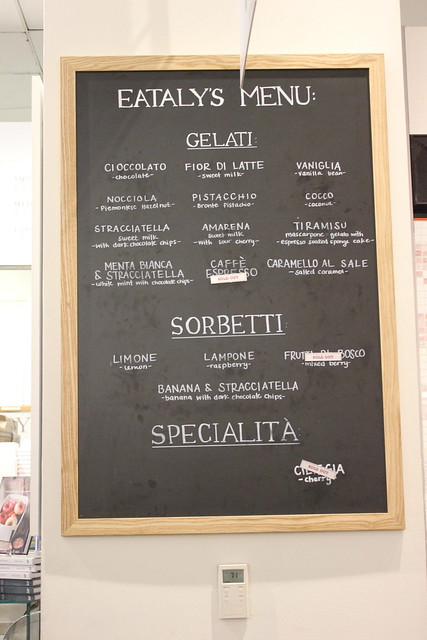
The chalk drawn menu listed several gelato flavors including chocolate, vanilla, pistachio, and some fruit sorbets, including raspberry.  We ended up getting a large cup to share, with up to three different gelato selections, for $6.90.  I chose Salted Caramel, my daughter chose Stracciatella (sweet cream with chocolate chips), and my son chose Coconut.  My husband is not picky and was happy enough with our choices.  The gelato was cold, creamy, and delicious and we all voted the Salted Caramel as our favorite.  The Coconut gelato, which we were originally trying to dissuade our son from choosing, was actually really tasty, with shreds of real coconut.

IMG_8740
Overall, the crowds of the place really detracted from our enjoyment.  I felt rushed and was more worried about losing my kids in the crowd than really enjoying the place.  While Eataly has restaurants that serve food very kid-friendly food, like pizza and pasta, the long waits were not child-friendly.  We would prefer to go again when the crowds aren’t so heavy. Unfortunately, since we make family trips into the city so infrequently, it is highly unlikely that we will be returning to Eataly anytime soon.

Have any of you been to Eataly? Please share your experiences in the comments section.

1

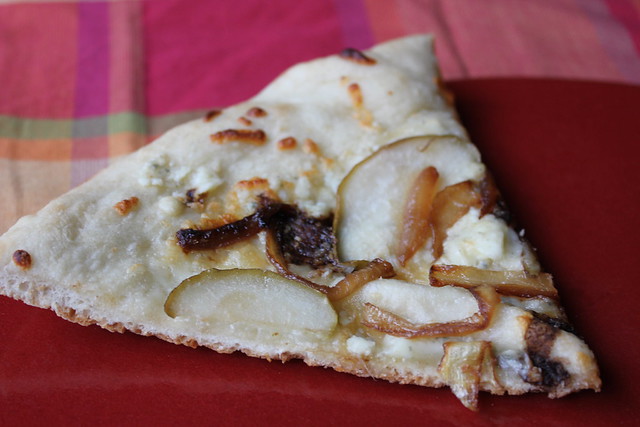
Onion, Pear & Gorgonzola Pizza with Balsamic Glaze

IMG_8789

We eat homemade pizza at least a few times a month, usually on Fridays. It’s quick, easy, and open to an almost unlimited number of toppings. Although we are capable of making and freezing our own dough, we are guilty of buying bagged dough at the supermarket. We have easy access to refrigerated dough from the Bronx and frozen dough from New Jersey. For the convenience and cost (about $1.50/ dough) that we can leave in the freezer until needed, we can’t help ourselves on this one.

Our parents stopped by this past week and we made a bunch of pies, from plain to veggie but the fancy one this week was a pear and gorgonzola pizza with a balsamic glaze:

Ingredients:
1 Pizza Dough (recipe or source of your choice)
1 Pear, sliced thin (we used Anjou)
Crumbed Gorgonzola (enough to cover the pie to your liking)
1 Cup of part-skim mozzarella
1/4 medium yellow onion, sliced
2 Tablespoons Olive oil (divided)
1/4 cup Balsamic vinegar
Flour for rolling the dough

Instructions:
Preheat the oven to 425 with a pizza stone on the top rack (if you have one). Sauté the onion in 1 Tablespoon of the olive oil in a small pan over medium heat, until softened. Put the balsamic vinegar into a small saucepan on medium heat and allow to reduce by half, stirring occasionally so you have a syrupy consistency. Meanwhile, stretch out the dough, using plenty of flour so the dough doesn’t stick to you or the board. Pull the heated stone from the oven when hot and place on your stovetop. Move the stretched dough onto the hot stone and quickly brush with the remaining 1T of the olive oil. Add the mozzarella, gorgonzola, sautéed onions and pear to the top. Bake in the ovenfor approx. 8-9 minutes or until the crust is browned. Drizzle the balsamic glaze evenly over the whole pie. Slice into 8 pieces and serve hot.


January Food and Wine Festivals

January Food Festivals

Depending on where you live in New York state and what your food and beverage preferences are, the below festivals might be of interest to you.  Please make sure to check the links for the most up-to-date information.  This list is only for informational purposes -I have not been to any of these festivals and cannot attest to the quality.

Galette de Rois Celebration (New York City)
http://www.fiaf.org/events/winter2014/2014-01-08-galette.shtml

Date:  January 8, 2015
Location: FIAF, Le Skyroom, 22 East 60th Street, New York, NYC 10022
Price:  $25 FIAF members (French Institute Alliance Française)
$30  non-members
Time: 6:30 pm

Pinot Days New York City (New York City)
http://www.pinotdays.com/Festivals/New_York_City.asp

Date:  January 18, 2015
Location:  City Winery: 155 Varick Street, Lower Westside Manhattan
Price:  $75 Grand Festival
$125 VIP Tasting and Seminar
Time:  Public Tasting 1 – 4 pm

2nd Annual Beer, Bourbon & BBQ Festival (New York City)
http://www.beerandbourbon.com/new-york/show-info

Date: January 24, 2015
Location: The Tunnel:  608 West 28th Street, NYC  10001
Price/Times:  Session 1 (Bacon Bash Tasting Session – Noon to 4 pm) $109 – sold out
Session 2 (The Whole Hog Pig Pickin’ Session – 5:30 – 9:30 pm) $99 – limited tickets available
Session 3 (The Grand Poobah Chicken N’ Biscuits Session – Noon – 9:30 pm) $199 – limited tickets available

4th Annual Niagara Wine & Beer Tasting (Niagara County)
http://www.niagarawineandbeerfest.com/

Date:  January 24, 2015
Location:  Kenan Center Arena – 195 Beattie Avenue, Lockport, New York 14094
Price:  $25 pre-sale
$30 at the event
$50 VIP
Time:  5-9 pm

Hudson Valley Wingbowl 8 (Dutchess County)
http://www.hvwingbowl.com/

Date:  January 24, 2015
Location:  Ramada Conference Center:  542 U.S. 9, Fishkill, New York 12524
Price:  $25 General Admission
$45 VIP
Kids 12 and under free
Time:  4:30 – 9:00 pm

Buffalo Winter Brewfest (Buffalo County)
http://www.buffalowinterbrewfest.com/

Date:  January 31, 2015
Location: Connecticut Street Armory:  184 Connecticut Street, Buffalo, New York 14213
Price:  $35 in advance
$45 at the door
$10 designated driver ticket
$55 VIP tickets (must pre-purchase)
Time:  Session 1:  1-4 pm
Session 2:  7-10 pm
VIP Hour:  6-7 pm

Saratoga Chowderfest (Saratoga County)
http://www.saratoga.com/winter/chowderfest.cfm

Date:  Janaury 31, 2015
Location: Downtown Saratoga Springs at participating establishments (pick up a ballot at any participating restaurant, vote for your favorites, and return completed ballot at the Saratoga Springs Visitor Center or the Saratoga Springs City Center – winner will be announced at 6:30 pm at the city center)
Price:  $1 per cup of chowder
Time:  11 am – 4pm

If I have left any off this list,  please comment or share so I can update.  If you have attended any of these festivals please share your experience!

1

CSA versus Farmers Markets

IMG_8754

Community Supported Agriculture, more widely known as CSA, is a membership arrangement between CSA members and one specific farm.  The member pays fees either upfront or on a payment system, depending on the farm.  This helps support the farm production costs at the beginning of the season.  In return, the member receives a weekly share of the harvest during the growing season.  Normally, the member  doesn’t pick the produce or other goods that they want in their “share” but instead receive a box with a variety of produce each week. There is of course risk buying into a CSA, with weather and other unforeseen circumstances that can affect harvest production. However, CSA membership supports the local economy and helps to keep small farms in business.

To contrast, farmer’s markets provide similar local economic support but an individual can go from stand to stand purchasing exactly what they want.

If you are interested in joining a CSA, now is the time to do so! Sign-ups for most CSAs have already begun and usually close by Mid-March.

We were torn between joining a CSA or relying on farmer’s markets for our weekly produce and, after considerable thought, I think that farmer’s markets work best for our family right now.  I was initially excited to find a CSA that is approximately 25 minutes away from where we live.  However, I would have to commit to driving to the farm on an assigned day between the designated times to pick up my share.  This particular CSA runs from May through October (20 weeks) and costs broke down to $32.50/week for vegetables only.

I think if we commit to making sure that visit the farmer’s market each week, like we would the grocery store, we will be more likely to make it each week.  I also think the kids will enjoy the process of seeing the different fruits and vegetables and picking out what they want us to try.  There are a couple of semi-local winter farmer’s markets near us that we can visit from January through May, when the regular farmer’s market season begins.  Once May arrives, there are several different farmer’s markets that we can visit.

We will be updating the blog with our purchases and recipes!


2

As Seen on Pinterest: Banana Bread Bars with Brown Butter Frosting

IMG_8792

We are always on the lookout for new recipes to use up the over-ripened bananas we always seem to have sitting on our counter.  I saw this recipe on Pinterest and thought the kids would enjoy these.  Please note that the recipe below is my adaption of the original recipes that were found.  The bars were easy to put together and my 8 year old daughter helped me do most of the prep.  After I made the frosting, I found the browned butter flavor to be tasty but overall, SUPER sweet.  To keep these bars more versatile, I only frosted half of them.  We ate most the unfrosted section of bars as part of our breakfast for several mornings.  The frosted side was more of a later day snack/dessert.  These bars were super moist and tasty.  Next time, I won’t even bother with the frosting and just make them as bars.

Banana Bread Bars with Brown Butter Frosting
Adapted recipe that was found on Life’s Simple Measures, originally from The Girl Who Ate Everything
Ingredients:
Banana Bread Bars:
1-1/2 c. sugar
1 c. plain yogurt
1/2 c. butter, softened
2 eggs
1-1/2 c. (2) ripe bananas, mashed
1 tsp. vanilla extract
2 c. all purpose flour
1 tsp. baking soda
3/4 tsp. salt
Brown Butter Frosting:
1/2 c. butter
3 c. powdered sugar
1 tsp. vanilla extract
3 tbsp. almond milk
Directions:
1.  Heat oven to 375F.  Grease 12×8-inch baking pan.  For the bars, in a large bowl, beat together sugar, yogurt, butter, and eggs until creamy.  Blend in bananas and vanilla extract.  Add flour, baking soda, salt, and blend for 1 minute.
2.  Spread batter evenly into pan.  Bake 40 to 45 minutes or until toothpick dipped in middle of bars comes out clear.

(Please note: the original recipe called for a 15×10 inch jelly pan and baking time of 20-25 minutes. I used a 12×8 inch pan that was smaller and deeper and my bars needed at least 40 minutes.)

 3.  Meanwhile, for frosting, heat butter in a large saucepan over medium heat until boiling.  Let the butter turn a delicate brown and remove from heat immediately.
4.  Add powdered sugar, vanilla extract and milk.  Whisk together until smooth (it should be thicker than a glaze but thinner than frosting).  Using a spatula, spread the brown butter frosting over the warm bars (the frosting will be easier to spread while the bars are still warm).
Yield: 2 dozen large bars