2

Slow Cooker Lentil and Brown Rice Tacos


Slow Cooker Lentil and Brown Rice Tacos

We are trying to eat meatless several nights during the week.  It has been challenging to find vegetarian recipes that the whole family will eat.  These tacos are a rare “recipe repeat” in our house, this being the second time that we have made these.  Our son, the pickiest eater in our house, ate two of these tacos.  (Honestly though, we think he will eat anything put in a taco shell with some cheese and sour cream!)  We love that the taco filling for this recipe is made in the slow cooker, which makes it a perfect busy weeknight meal.  Tacos are so versatile, that you can add any types of toppings to these that you’d like.  We weren’t too creative with ours, serving them with just cheese and sour cream and they were still a hit.  The lentil and rice combo is filling and tasty enough for us that we don’t feel like we’re missing out on not having meat.

Slow Cooker Lentil and Brown Rice Tacos
Recipe slightly adapted from Melanie Makes, which was adapted from The Complete Guide to Imperfect Homemaking

Ingredients:
1 cup lentils
1/2 cup brown rice
1 onion, diced
4 cloves garlic, minced
4 1/2 cups water
1 1/2 tablespoons chili powder
½ teaspoon onion powder
1/4 teaspoon red pepper flakes
½ teaspoon paprika
1 1/2 teaspoons cumin
1½ tsp salt
½ tsp black pepper

Directions:

1. Add all ingredients to slow cooker and stir to combine.

2. Cover and cook on HIGH 4 hours or LOW 6-8 hours, stirring during the last hour of cooking.


1

Sweet and Spicy Popcorn

IMG_8872

Today is National Popcorn Day.  Our family loves popcorn!  We always have at least one box of microwave popcorn on hand for movie nights.  In our attempt to eat healthier, we have been trying to buy non-GMO, natural popcorn with no butter or flavoring and possibly just some salt added. To help flavor the popcorn, we’ve been on the lookout for recipes that allow us to add our own flavoring.  We saw this recipe for Sweet and Spicy Popcorn in Geoffrey Zakarian’s new cookbook My Perfect Pantry* and thought we’d try it out.  The kids didn’t enjoy it that much and luckily, we didn’t flavor all of the popcorn, so that they could have some without the seasoning on it.  We thought it added nice flavor to the company and we could taste the spicy and sweet.  The “spicy” was not overwhelming at all and the seasoning ratios of can be adjusted based on your spice tolerance/preference.

Sweet and Spicy Popcorn
Recipe slightly adapted from coobook My Perfect Pantry by Geoffrey Zakarian

Ingredients:
1 bag of natural (no butter) microwave popcorn
4 Tablespoons unsalted butter
1/4 teaspoon cayenne
1/2 teaspoon five spice powder
1/2 teaspoon paprika
2 teaspoons light brown sugar
kosher salt

Directions:

1. Microwave popcorn and put into large bowl.

2. In a small saucepan, melt the butter over low heat. Once melted, add the spices, cooking until fragrant, approximately one minute. Stir in the sugar until it dissolves.

3. Drizzle the spiced butter over the popcorn. Sprinkle with salt and toss well to mix.

We ended up having leftover popcorn that we stored in a sealed container for two days.

*We received My Perfect Pantry by Geoffrey Zakarian from Blogging for Books for a review.

19

Leftover Mashed Potato Gnocchi


IMG_0454[1]

We hate wasting food and are getting better about using up leftovers.  When we ended up with a ton of leftover mashed potatoes after a family gathering, an aunt suggested that we make gnocchi.  We have made ricotta gnocchi before, but had never tried making them with leftover mashed potatoes.  We found this recipe and realized how easy it was!  After cooking the gnocchi in the water, we sautéed them in some butter until they turned golden brown.  Sprinkled with some parmesan at the end, these were soft, pillowy bites of deliciousness that we all gobbled up!

Leftover Mashed Potato Gnocchi
Recipe adapted from Food & Whine

Ingredients:
2 cups mashed potatoes
1 cup flour (approx)
1 egg
1T butter
1T olive oil
salt and pepper to taste

Directions:
Combine mashed potatoes, flour and egg in a large bowl until it forms a ball of dough. Add more flour if dough is sticky. Turn dough out onto a well-floured surface and divide into 3 sections. Roll sections into long snakes with about a 3/4″ diameter. Cut each snake into 1″ pieces. Take a fork and press down on the tops of each piece to create ridges.  Place gnocchi one at a time into a large pot of boiling water until they rise to the top. Remove from water. Cook with  butter/oil in a large fry pan until browned.  Serve with your favorite pasta sauce or simply with some shredded parmesan cheese.


As Seen on Pinterest: Mocha Snickerdoodles

Mocha Snickerdoodles

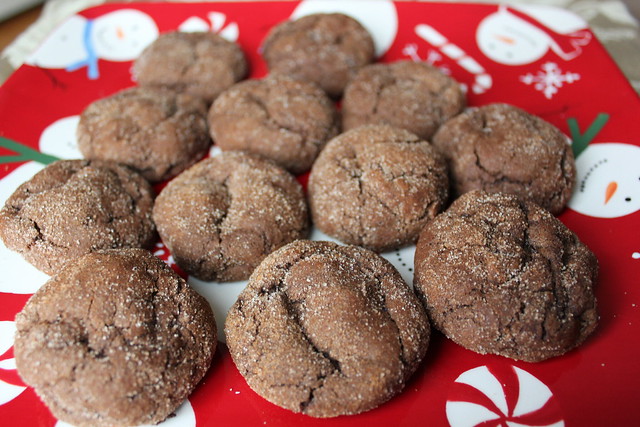
Everyone loves cookies, right?!!  I’m not much of a baker, but after muffins, cookies are my favorite thing to bake. I can stick the cookies in the freezer and pull a couple out when I’m in the mood for something sweet.  I love anything mocha and these Mocha Snickerdoodles were a winner!  The combination of chocolate, coffee and hint of cinnamon was spot on!  The original pin I found here was for Espresso Snickerdoodles.  To make these cookies more kid-friendly, and not have my children hyped up on caffeine, I used decaf coffee granules.  With the exception of the hour the dough needs to chill, these cookies were really quick and easy to make.  These were moist, chocolatey cookies with a hint of coffee flavor that we all liked. The recipe made about 36, which was way too many for us.  I was feeling generous when I made these and sent some in with my husband so his co-workers could enjoy them as well!

Mocha Snickerdoodles
Slightly adapted from recipe found at Cupcakes and Kale Chips from guest blogger Tanya from Lemons for Lulu

Ingredients:

  • 3 tablespoons water
  • 2 tablespoons decaffeinated coffee granules
  • ½ cup butter softened
  • ¾ cup granulated sugar
  • ¾ cup brown sugar
  • 1 teaspoon cream of tartar
  • ½ teaspoon baking soda
  • ½ teaspoon salt
  • 2 eggs
  • 2 teaspoons vanilla
  • ½ cup cocoa powder
  • 2 ¼ cup flour
  • ¼ cup sugar
  • 2 teaspoons cinnamon
 Instructions:
  • In a small bowl, combine water and decaffeinated coffee granules and stir until dissolved.
  • In a mixing bowl, beat butter and sugars together until creamy. Stir in cream of tartar, baking soda and salt. Add eggs one at a time. Add vanilla and coffee mixture. Slowly beat in cocoa powder and flour.
  • Cover and chill dough for at least one hour or until easy to handle.
  • Preheat oven to 350°F. Stir together sugar and cinnamon in a small bowl.
  • Shape dough into 1 ¼ inch balls, roll in sugar mixture and place onto baking sheets.
  • Bake for 10-12 minutes or until edges are set.
  • Let cookies stand for 1 minute on baking sheet before removing to a wire rack to cool.
2

Creamy Parsnip Soup

IMG_8833

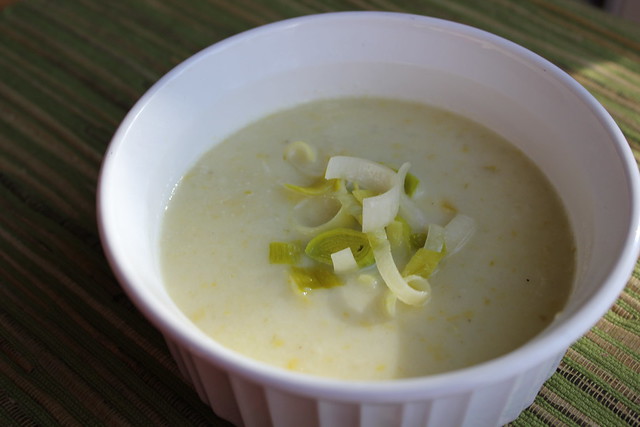
January has a wealth of month long food related celebrations including being National Soup Month.  Soup is perfect for the cold winter days we’ve been experiencing in New York recently. In honor of National Soup Month, I made a Creamy Parsnip Soup.   Parsnips are cream colored root vegetables that are closely related to carrots. They have a sweet, nutty flavor and are high in vitamins, minerals and dietary fiber.  Parsnips, like other root vegetables, are in their peak season Fall through Spring.  We rarely cook with parsnips and the kids did not remember ever trying them, when we told them we were having Creamy Parsnip Soup.  The below recipe uses parsnips, apples, potato and leeks, all of which are in peak season, which makes this a seasonally appropriate soup.  The apples and parsnips give the soup a sweet flavor.  While the kids didn’t love this soup, they both finished their serving.  The adults thought this was tasty.  We served this soup with Italian Herb Muffins to round out the meal.

Creamy Parsnip Soup
Recipe slightly adapted from Every Day Food, November 2005

Ingredients:
2 tablespoons butter
1 pound prepared sliced leeks (2 cups)
1 pound parsnips, trimmed, peeled, and cut crosswise into 1-inch pieces
2 apples, peeled, cored, and cut into 1-inch pieces
1 medium baking potato (about 1/2 pound), peeled and cut into 1-inch pieces
1 can (14.5 ounces) reduced sodium chicken broth
1/2 cup heavy cream
Salt and pepper

Directions:
1.Heat butter in a large pot over medium heat. Add the leeks and cook, stirring, 5 minutes. Remove 1/2 cup to garnish soup.

2.Add parsnips, apples, potato, broth, and 4 cups water. Bring to a boil; reduce heat and simmer, partially covered, until vegetables are tender, 20 to 25 minutes.

3.Use a stick blender to puree the soup until smooth. If you don’t have a stick blender, working in batches, puree soup in a blender until smooth and return to the pot. Stir in cream. Season with salt and pepper. Serve with Leek Garnish.

1

Onion, Pear & Gorgonzola Pizza with Balsamic Glaze

IMG_8789

We eat homemade pizza at least a few times a month, usually on Fridays. It’s quick, easy, and open to an almost unlimited number of toppings. Although we are capable of making and freezing our own dough, we are guilty of buying bagged dough at the supermarket. We have easy access to refrigerated dough from the Bronx and frozen dough from New Jersey. For the convenience and cost (about $1.50/ dough) that we can leave in the freezer until needed, we can’t help ourselves on this one.

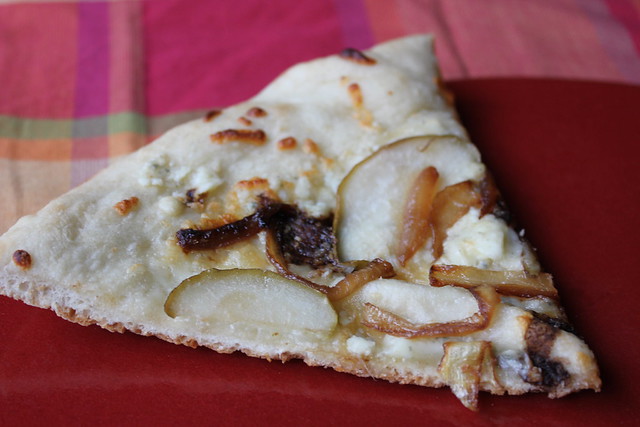
Our parents stopped by this past week and we made a bunch of pies, from plain to veggie but the fancy one this week was a pear and gorgonzola pizza with a balsamic glaze:

Ingredients:
1 Pizza Dough (recipe or source of your choice)
1 Pear, sliced thin (we used Anjou)
Crumbed Gorgonzola (enough to cover the pie to your liking)
1 Cup of part-skim mozzarella
1/4 medium yellow onion, sliced
2 Tablespoons Olive oil (divided)
1/4 cup Balsamic vinegar
Flour for rolling the dough

Instructions:
Preheat the oven to 425 with a pizza stone on the top rack (if you have one). Sauté the onion in 1 Tablespoon of the olive oil in a small pan over medium heat, until softened. Put the balsamic vinegar into a small saucepan on medium heat and allow to reduce by half, stirring occasionally so you have a syrupy consistency. Meanwhile, stretch out the dough, using plenty of flour so the dough doesn’t stick to you or the board. Pull the heated stone from the oven when hot and place on your stovetop. Move the stretched dough onto the hot stone and quickly brush with the remaining 1T of the olive oil. Add the mozzarella, gorgonzola, sautéed onions and pear to the top. Bake in the ovenfor approx. 8-9 minutes or until the crust is browned. Drizzle the balsamic glaze evenly over the whole pie. Slice into 8 pieces and serve hot.


2

As Seen on Pinterest: Banana Bread Bars with Brown Butter Frosting

IMG_8792

We are always on the lookout for new recipes to use up the over-ripened bananas we always seem to have sitting on our counter.  I saw this recipe on Pinterest and thought the kids would enjoy these.  Please note that the recipe below is my adaption of the original recipes that were found.  The bars were easy to put together and my 8 year old daughter helped me do most of the prep.  After I made the frosting, I found the browned butter flavor to be tasty but overall, SUPER sweet.  To keep these bars more versatile, I only frosted half of them.  We ate most the unfrosted section of bars as part of our breakfast for several mornings.  The frosted side was more of a later day snack/dessert.  These bars were super moist and tasty.  Next time, I won’t even bother with the frosting and just make them as bars.

Banana Bread Bars with Brown Butter Frosting
Adapted recipe that was found on Life’s Simple Measures, originally from The Girl Who Ate Everything
Ingredients:
Banana Bread Bars:
1-1/2 c. sugar
1 c. plain yogurt
1/2 c. butter, softened
2 eggs
1-1/2 c. (2) ripe bananas, mashed
1 tsp. vanilla extract
2 c. all purpose flour
1 tsp. baking soda
3/4 tsp. salt
Brown Butter Frosting:
1/2 c. butter
3 c. powdered sugar
1 tsp. vanilla extract
3 tbsp. almond milk
Directions:
1.  Heat oven to 375F.  Grease 12×8-inch baking pan.  For the bars, in a large bowl, beat together sugar, yogurt, butter, and eggs until creamy.  Blend in bananas and vanilla extract.  Add flour, baking soda, salt, and blend for 1 minute.
2.  Spread batter evenly into pan.  Bake 40 to 45 minutes or until toothpick dipped in middle of bars comes out clear.

(Please note: the original recipe called for a 15×10 inch jelly pan and baking time of 20-25 minutes. I used a 12×8 inch pan that was smaller and deeper and my bars needed at least 40 minutes.)

 3.  Meanwhile, for frosting, heat butter in a large saucepan over medium heat until boiling.  Let the butter turn a delicate brown and remove from heat immediately.
4.  Add powdered sugar, vanilla extract and milk.  Whisk together until smooth (it should be thicker than a glaze but thinner than frosting).  Using a spatula, spread the brown butter frosting over the warm bars (the frosting will be easier to spread while the bars are still warm).
Yield: 2 dozen large bars