Foodie Movie Review: GMO OMG

This week’s edition of Weekend Chef’s Foodie Movie Review is based on another Netflix find: GMO OMG. This 2013 documentary is a film by Jeremy Seifert. Mr. Seifert is a father of 3 young children and the film follows him on his quest to find the source of the food that his family eats, primarily to see how much of what they eat involve the use of GMOs. For those who don’t know, GMO stands for Genetically Modified Organism and can mean anything from tomatoes that are bred to glow in the dark to corn that is bred to resist pesticide. In some respects, mankind has been tinkering with plant genetics for millennia. Recent concerns about GMO crops stem from the extent that plant DNA has been scientifically changed and whether the new foods can cause the end users any long-term ill effects. The director’s goal in the film is to show how pervasive GMO’s are in our food chain. Large portions of our corn and soybean crops are modified to some extent and the majority of supermarket foods contain either corn, soybeans or both. The issue is whether or not the food we eat is harmful. I believe the director took the stance that it is harmful without sufficient scientific evidence to back it up . We may not know whether the incredible yields that have the ability to feed a growing global population are in some way poisoning those same people for many years to come. The science of genetic plant breeding may be a two-edged sword but only time will tell if there are negatives to outweigh the positives. I understand Mr. Seifert’s concerns. I have two young children myself and we should certainly try to be aware of the source of the foods we eat. However, I feel his quest to completely remove it from his family’s diet out of fear or precaution set a negative tone and removed the subjectivity from the documentary.

How do all of you feel about GMOs? A blessing to feed the world or a killer in disguise? Please share your thoughts in the comment section.



1

Spinach Quiche

Spinach Quiche

Spinach Quiche

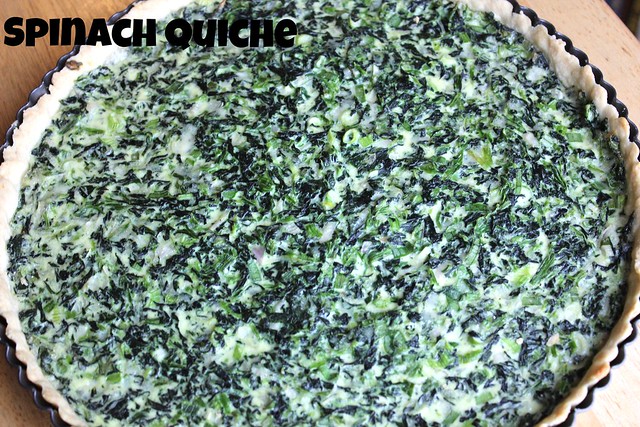
We are a bit behind in our posting, but March’s Supper Club theme was appropriately themed “green.”  While I made Copycat Cheesecake Factory Avocado Eggrolls, which were a huge FAIL (if pre-making and transporting, they need to be placed on parchment paper and floured or else, they might just stick to the cookie sheet (even though we floured it) and rip and tear and have all the filling fall out, prior to attempting to deep-fry!), the Weekend Chef made this spinach quiche.  When our daughter found out that our supper club theme was “Green”, she suggested to the Weekend Chef that he make a spinach pie…..and so, he went with it.  He even ran out to Marshalls and bought a special French quiche pan to make this in!  Please note that the original recipe calls for a 9-inch pan.  The Weekend Chef realized he bought a 12-inch pan as he was laying the dough in it, so the crust was a bit thinner than in the recipe.  Even though this recipe used only a couple of simple ingredients, it was flavorful and enjoyed by all.  Leftovers were great for breakfast the next day!

Spinach Quiche
Recipe from Smitten Kitchen, adapted from Bon Appetit, October 1991

Dough Recipe (Pate Brisee):
From Martha Stewart

Ingredients:
2 1/2 cups all-purpose flour
1 teaspoon coarse salt
1 teaspoon sugar
1 cup (2 sticks) chilled unsalted butter, cut in pieces
1/4 to 1/2 cup ice water

Directions:
1. Place the flour, salt, and sugar in the bowl of a food processor, and process for a few seconds to combine. Add the butter, and process until the mixture resembles coarse meal, about 10 seconds. With the machine running, add the ice water in a slow, steady stream, through the feed tube, just until the dough holds together. Do not process for more than 30 seconds.

2.  Turn the dough out onto a floured work surface. Divide in two. Place each half on a sheet of plastic wrap. Flatten, and form two discs. Wrap, and refrigerate at least 1 hour before using. Can be refrigerated overnight.

For the Quiche:

Ingredients:
1 3-ounce package cream cheese, room temperature
1/3 cup half and half
3 eggs
1 10-ounce package frozen chopped spinach, thawed and well drained
1/2 cup grated cheddar
1/4 cup shredded Parmesan
4 to 6 green onions, thinly sliced
1/4 teaspoon salt
1/4 teaspoon pepper

Directions:
Preheat oven to 425°. Beat cream cheese in medium bowl until smooth. Gradually beat in half and half and eggs. Mix in remaining ingredients. Evenly press one round of the dough into a quiche pan or similar low metal or glass baking dish. Pour filling mixture into unbaked crust. Bake until crust is golden brown and filling is set, about 25 minutes. Cool at least 10 minutes before serving. Can be served at room temperature.

1

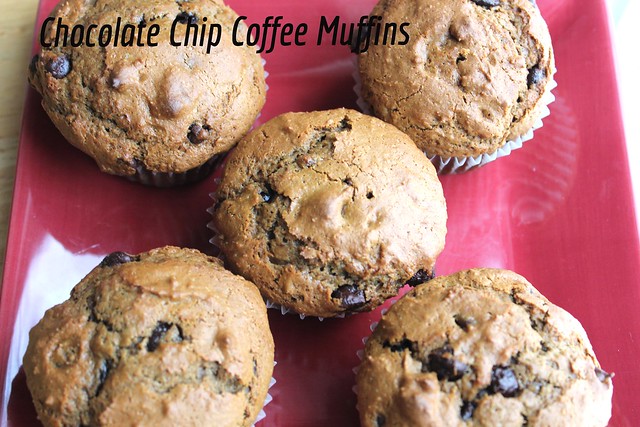
Chocolate Chip Coffee Muffins

Chocolate Chip Coffee Muffins

If you are like us, some mornings can be more hectic than others.  Trying to get the kids up and dressed and feed them breakfast before they have to be at before school activities can sometimes be difficult.  That’s when muffins come in handy.  A muffin, some yogurt and a piece of fruit make a quick, easy and healthy breakfast (or even lunch!).  Muffins in general are easy to prepare and cook much quicker than making a bread.  I love that I can make a batch, freeze them and can take them out as needed.  These chocolate chip coffee muffins were enjoyed by both the adults and the kids.  I used decaffeinated coffee granules to make them more child-friendly.  These will be making an appearance in our kitchen again soon!

Chocolate Chip Coffee Muffins
Recipe adapted from Very Culinary

Ingredients:
2 cups all purpose flour
2/3 cup granulated sugar
2 teaspoons baking powder
1/4 teaspoon salt
1 cup semi-sweet chocolate chips
2/3 cup milk
5 tablespoons unsalted butter, melted
1 teaspoon vanilla
1 large egg
2 tablespoons instant decaffeinated coffee granules

Directions:
1. Preheat oven to 400. Line muffin tin with cupcake liners.

2. In a large bowl, combine the flour, sugar, baking powder, salt, and chocolate chips.

3. In a medium bowl, whisk together the milk, butter, vanilla, egg, and coffee granules.

4.  Add the liquid mixture to the dry ingredients in the large bowl and combine until just moist. Spoon the batter into the muffin liners and bake for 15-18 minutes until a toothpick in the center comes out clean. Remove from oven and transfer to a wire rack to let cool.

4

Easy Lo Mein

IMG_9439

Happy first day of April!  No jokes for you here!  It’s been a LOOOONG winter and I am very much looking forward to some warm spring weather!  Anything is better than the snow that we got last night!  March came in like a lion and left like a lion! April is going to be a busy month around here and I cringe looking at all the boxes filled in on the calendar already!  We have lots to celebrate though including Passover, our wedding anniversary, Easter, and our daughter’s birthday.

When life gets busy, it’s really easy to want to order Chinese take-out.  We can literally walk to the take-out restaurant, it’s that close.  When we do order Chinese take out we get the usual sesame chicken for the kids.  Occasionally, they’ll request lo mein as well.  However, with this recipe we can make lo mein at home.   This “Easy Lo Mein” is well…….really easy to make!  It’s really versatile in that you can pick and choose what veggies you want to use.  The kids like the noodles and sauce and can pick out the veggies that they don’t want. It’s quick to make and so much healthier than the take out stuff!

Easy Lo Mein
Recipe adapted from Damn Delicious

Ingredients:
8 ounces lo mein egg noodles
1 tablespoon olive oil
2 cloves garlic, minced
2 cups cremini mushrooms, sliced
1 red bell pepper, julienned
1 carrot, julienned
1 box frozen spinach, thawed and squeezed out

For the sauce:
2 tablespoons reduced sodium soy sauce
2 teaspoons sugar
1 teaspoon sesame oil
1/2 teaspoon Sriracha, or more, to taste

Directions:
1.  In a small bowl, whisk together the soy sauce, sugar, sesame oil and Sriracha.  Set aside.

2.  In a large pot of boiling water, cook the lo mein noodles according to package instructions and drain.

3.  Heat olive oil in a large skillet over medium high heat. Add the garlic, mushrooms, bell pepper and carrot. Cook about 3-4 minutes, until tender, stirring frequently. Stir in the spinach and cook 1- 2 minutes to heat through.

4.  Stir in the lo mein noodles and soy sauce mixture, gently tossing to combine.


1

Pretzel Crusted Chicken Fingers with Curried Honey Mustard Dipping Sauce


Pretzel Crusted Chicken Fingers

Chicken fingers are a staple children’s food.  It’s rare to find a restaurant kid’s menu without them.  When doing the weekly menu planning I try to  find at least one recipe that I know the kids will really enjoy.  I’m not always successful in my endeavors.  However, when I made these  pretzel chicken fingers a couple of weeks ago they were a big winner!  These are super kid-friendly and tasted good.  My daughter helped with the preparation of these and enjoyed banging the pretzels into crumbs. The pretzel coating gives the chicken a nice salty, crunch.  The combination of flavors in the dipping sauce helped make the dish a little more adult friendly, although the kids enjoyed it as well.  I served these with some fries and veggies to complete the meal.

Pretzel Crusted Chicken Fingers with Curried Honey Mustard Dipping Sauce
Recipe adapted from Mika’s Pantry

Ingredients:
1 lb. boneless chicken breasts, cut into
1/4 cup flour, for dredging
Salt and pepper
4 1/2 cups pretzels, crushed
1 egg, beaten
oil

Curried Honey Mustard Dipping Sauce:
½ cup mayo
2 tablespoons yellow mustard
½ teaspoon garlic powder
1 tablespoon white vinegar
2 tablespoons honey
½ teaspoon curry powder
Salt and pepper, to taste

Combine all of the ingredients in a small bowl, mixing well.

Directions:
1.  Heat oil in a large skillet over medium-high heat.

2.   While oil is heating, place flour, eggs and pretzel crumbs into 3 separate bowls.

3.  Dip chicken pieces into the flour,  the egg and then the crushed pretzels.

4.   When the oil is heated, place the chicken pieces in the pan and cook 3-4 minutes.  Turn chicken over and cook 3-4 more minutes until heated through.

4.   Place the chicken on paper towels to drain.  Serve warm with the dipping sauce.


4

Olive Potato Pizza

Olive Potato Pizza

Pizza has been almost a Friday night staple in our house.  Especially with Lent and us not eating meat on Fridays.  Homemade pizza is super quick and easy and we all love it!  When I have a little extra time, I try to make a more interesting pizza than just plain cheese.  This pizza is a great no-meat addition to our pizza rotation.   The potatoes, mixed with the slight heat of the crushed red pepper and the saltiness of the olives was a flavorful combination.  I made a plain, cheese pizza for the kids and the Weekend Chef and I ate this pizza up!

Olive Potato Pizza
Recipe adapted from Cooking Light, August 2001

Ingredients:
2 cups russet potatoes, peeled and sliced thin
1 store bought refrigerated pizza dough
1/4 cup + 2 Tablespoons tomato sauce
1/4 teaspoon salt
1/4 teaspoon crushed red pepper
1 garlic clove, crushed
1 cup shredded part-skim mozzarella cheese
1/2 cup chopped pitted kalamata olives

Directions:
1. Place pizza stone, if have one, into oven and preheat to 450°.

2. Place the potato slices in a saucepan; cover with water. Bring to a boil and cook 7 minutes or until tender. Drain.

3. Combine the potato slices, tomato sauce, salt, pepper, and garlic.

3. Roll pizza dough into a 12-inch circle on a lightly floured surface. Once oven is heated, carefully take out the pizza stone and place the dough on it. Spread the potato mixture over the pizza crust, leaving a 1-inch border. Sprinkle the pizza with cheese and olives.

4. Bake at 450° for 15 minutes or until lightly browned. Cut into 8 wedges.


1

Hash Brown Bake with Eggs & Smoked Salmon


Hash Brown Bake with Eggs & Smoked Salmon

The kids love breakfast for dinner.  I make a lot of egg casseroles, french toast and pancakes for quick, easy weeknight dinners that I know the kids will eat.  I had saved this recipe for awhile from an old Every Day with Rachael Ray magazine, debating whether or not to make it.  The kids like cooked salmon and my son loves salmon sushi rolls.  I wasn’t sure how much, or even if, they liked smoked salmon.  I decided to try it and figured, if anything, they could pick off the salmon if they didn’t like it.  This isn’t a quick meal to make, as it bakes for 50 minutes.  However, it’s pretty easy in the preparation part.  I am fortunate enough to work from home, where I can prep this early enough, get it in the oven to bake and still help the kids with homework and get them showered before we eat.  We all enjoyed this meal.  It took the classic cream cheese and lox and elevated it to a new level with the addition of potatoes and eggs.  While it’s a bit heavy, especially with the warmer weather approaching, it’s a great recipe to bookmark for cooler weather!

Hash Brown Bake with Eggs & Smoked Salmon
Recipe adapted from EveryDay with Rachael Ray magazine (issue unknown)

Ingredients:
8 ounces cream cheese, room temperature
1/2 cup  almond milk
3 tablespoons butter, melted
1 36 ounce bag   frozen hash browns, thawed
1/4 cup thinly sliced scallions, plus more for garnish
Salt and pepper
6 eggs
6 ounces thinly sliced smoked salmon
2/3 cup sour cream

Directions:
1. Preheat oven to 375 degrees . Grease a 9 x 13 inch baking dish. In a large bowl with a hand mixer, blend the cream cheese, milk and butter until smooth.

2. In another large bowl, combine the hash browns, cream cheese mixture and 1/2 cup scallions. Season with salt and pepper. Transfer to the baking dish and smooth the top. Using a large spoon, make six shallow indentations in the hash browns. Bake until the edges are brown, about 45 minutes.

3.Remove the casserole from the oven. Preheat the broiler. Crack an egg into each indentation and season. Broil until the whites are set, 3 to 4 minutes.

4. Place a slice of salmon and a dollop of sour cream next to each egg. Garnish with scallions.

4

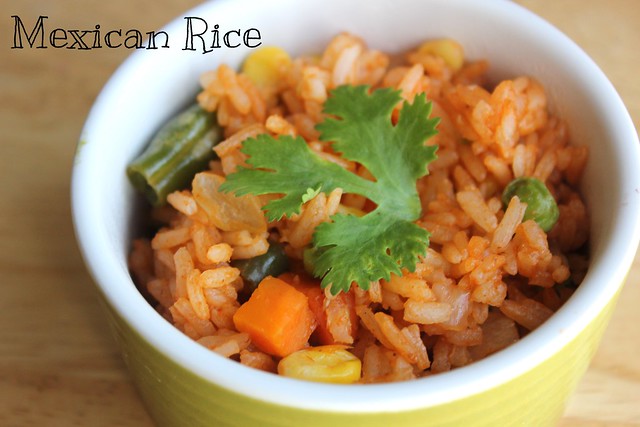
Mexican Rice

IMG_9575

In our house we eat a lot of Mexican food.  It’s a cuisine that I know the kids like and will eat.  Tacos, enchiladas, quesadillas, burritos….they love ’em all!  Sometimes I’ll serve the main dish with a salad or some veggies and sometimes I’ll also make rice to go with it.  The original recipe for this Mexican Rice called for a cup of corn, 1/2 cup of frozen peas and 1/2 cup diced carrots.  I hate having small portions of leftover ingredients which I never end up using!  So instead of having leftover unused portions of veggies, I bought a box of frozen mixed vegetables.  So, this rice might of had some string beans in it, which I wasn’t going to pick out!   This is a pretty quick and easy side dish that the kids enjoyed.  It definitely beats those boxed rice mixes!

Mexican Rice
Recipe adapted from Damn Delicious

Ingredients:
1 tablespoon olive oil
1 large garlic clove, minced
1 onion, diced
1 1/2 cups basmati rice
1 (8-ounce) can tomato sauce
1 1/2 cups vegetable broth
1 (10-ounce) box frozen mixed vegetables
1/4 teaspoon chili powder
1/4 teaspoon cumin
Kosher salt and freshly ground black pepper, to taste
2 tablespoons chopped fresh cilantro leaves

Directions:
1.   Heat olive oil in a large skillet over medium heat. Add garlic and onion, and cook approximately 2-3 minutes, until onions become translucent.  Stir in rice until toasted, about 2 minutes.

2. Stir in tomato sauce and vegetable broth, and bring to a simmer, about 2 minutes. Stir in frozen vegetables, chili powder and cumin; season with salt and pepper, to taste. Bring to a boil; cover, reduce heat and simmer until rice is cooked through, about 13-16 minutes.

3.  Serve immediately, garnished with cilantro, if desired.


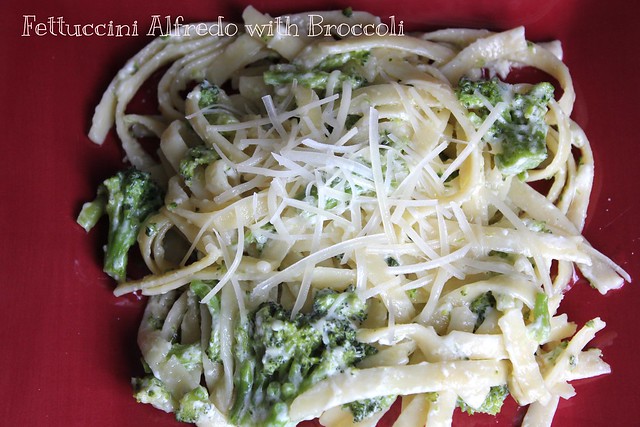
Fettuccini Alfredo with Broccoli

IMG_9350

Caution:  unhealthy recipe ahead.  Continue at your own risk!   This is the classic, creamy, full-fat comfort dish that we all know and love.  As spring will soon be here, and if you’re like us, hoping to eat a bit healthier, I am trying to post the last of the cold weather comfort food dishes that we’ve eaten recently.  So back to this fettuccini dish.  I attempted to make it a little healthier by adding broccoli.  We rarely eat dishes like this.  But sometimes, you just need a big plate of pasta with cream sauce!  This is quick and easy (and much cheaper than if you ordered at a restaurant!) to make at home for a busy weeknight dinner!  Of course we all ate and enjoyed this!

Fettuccini Alfredo with Broccoli
Recipe adapted from Tasty Kitchen

Ingredients:
½ cups butter
3 cloves garlic, minced
2 cups heavy cream
1-½ cup grated parmesan cheese
3 tablespoons cream cheese
1 pound fettuccini pasta, cooked
12 ounce bag frozen broccoli florets, cooked
½ teaspoons pepper
1 dash salt

Directions:
1.
Melt the butter in a large skillet and saute the garlic for two to three minutes.

2. Add the heavy cream and bring to a simmer.

3. Add the parmesan and cream cheese stirring to melt. Add salt and pepper.

4. Mix in the broccoli and cooked pasta.  Serve sprinkled with additional grated parmesan cheese, if desired.

Aprons Are a Cook’s Best Friend!

ApronsI cannot tell you how many pieces of clothing  that I have ruined while cooking!  It took me awhile to learn, but now an apron is a cooking necessity for me.  This is especially true when hosting holidays and having guests over when I’m dressed in “nice” clothes.  I’ve never actually bought myself an apron.  All of the aprons I own have been gifts.  I am super late in joining Etsy, and only joined last month.  It is unbelievable to see the number and variety of things for sale on the site!  Today, I wanted to share with you some of the amazing aprons that I have found while perusing Etsy.    Now, I have not purchased any of these aprons, only fallen in love with them!  All of the below retailers had tons of five star reviews.  While I only featured my favorite, check out the vendors below.  They have lots of different styles, colors and patterns.  These would make a great gift for your favorite chef!  Click on the vendor name to be taken to the Etsy page.

*Permission was granted by all vendors to use their photos.  I was not compensated for these reviews, I just wanted to showcase some pretty aprons that I recently found on Etsy!

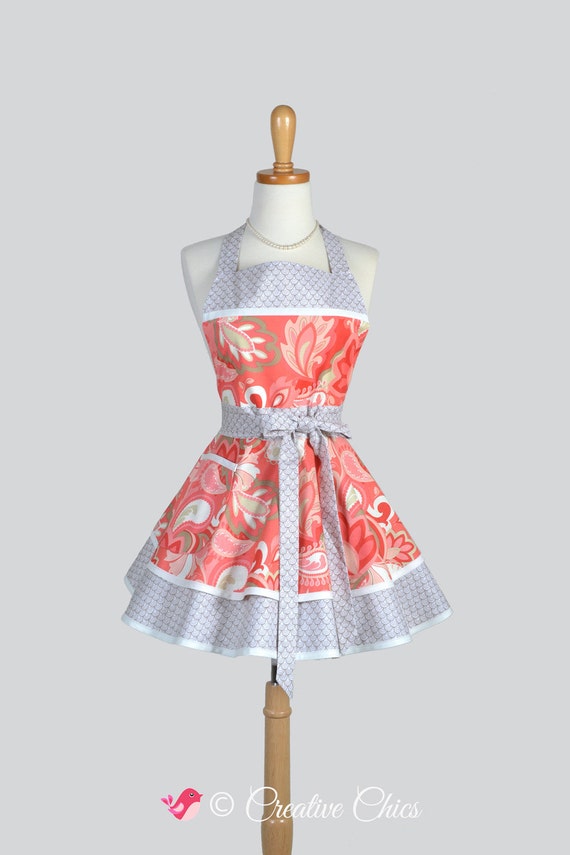
1.  CreativeChics – How cute is this ruffled retro apron?!!!  I especially love the pattern and color combo of this particular apron.  The apron is handmade in the USA.  This one retails for $45.00.  CreativeChics has one of the largest selection of aprons on Etsy.  If you like this style, they have a bunch of different color/pattern combinations and they have over 2,600 5 star reviews!

Ruffled Retro Apron . Cute Sassy Womens Retro Apron in Coral Paisley and Taupe Print with Coordinating Navy Blue on White Dot Fabric

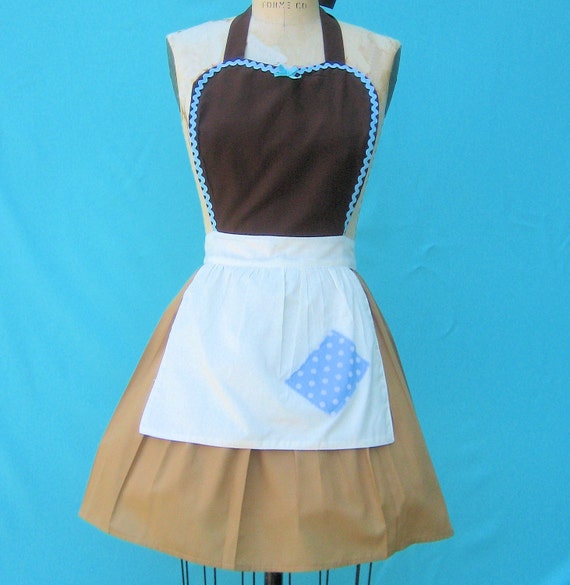
2. loverdoversclothing – With the new Cinderella coming to theaters on March 13, I had to showcase these two!  The Cinderella Work apron retails for $28.50 and the Princess Style apron retails for $39.  If you like these, loverdoversclothing also sells Elsa, Aurora (Sleeping Beauty), Snow White, Little Mermaid and Belle aprons as well.  They also sell Princess costumes and dresses for little girls.  This is a vendor that’s definitely worth checking out!

apron CINDERELLA  Work APRON  Princess style  womens full Apron from Lover Dovers

CINDERELLA APRON  Princess style  womens full Apron from Lover Dovers

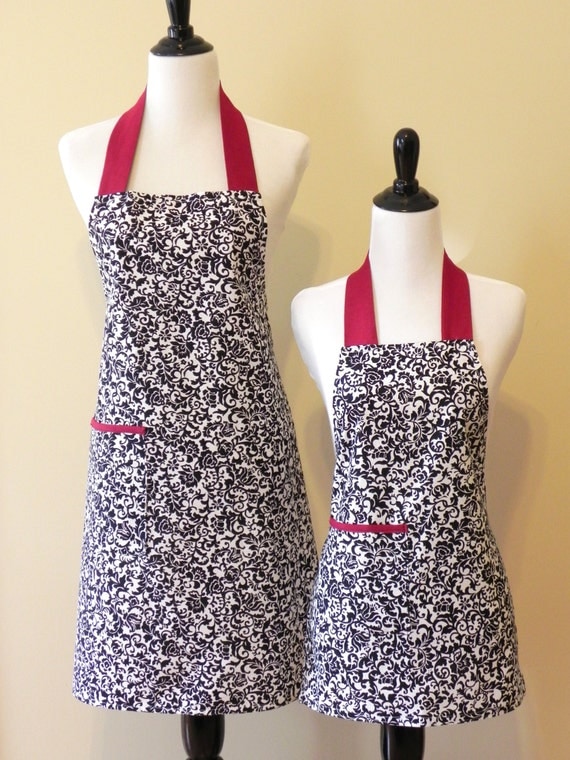
3.  PrettyCreationsByMe – If you have a child, you most likely have cooked with him or her.  What is cuter than wearing matching aprons?!  I especially liked this black, white and red combo pictured below.  The apron set retails for $29.99 for both aprons.  The aprons are handmade in the United States.  If you are looking for an apron just for your daughter, Anita sells cute child aprons in a variety of patterns as well.  She has 53 five star reviews.

Mommy and Me Apron set Mother Daughter apron set Matching Apron Set Black and Red matching Aprons

4.  SomethingYouAprons -Monogram is always in style.  Carol at SomethingYouAprons sells a variety of color and monogram styles in her Etsy shop.  I really like the color combination of the navy, green and pink on this apron, which retails for $27.95.  These aprons are handmade in the USA and Carol’s shop has 985 five-star reviews.

Circle Monogrammed Personalized Apron - Round Preppy Chefs Gift Idea Ribbon Bakers Womens Wedding Bridal Shower Custom Customized Adult

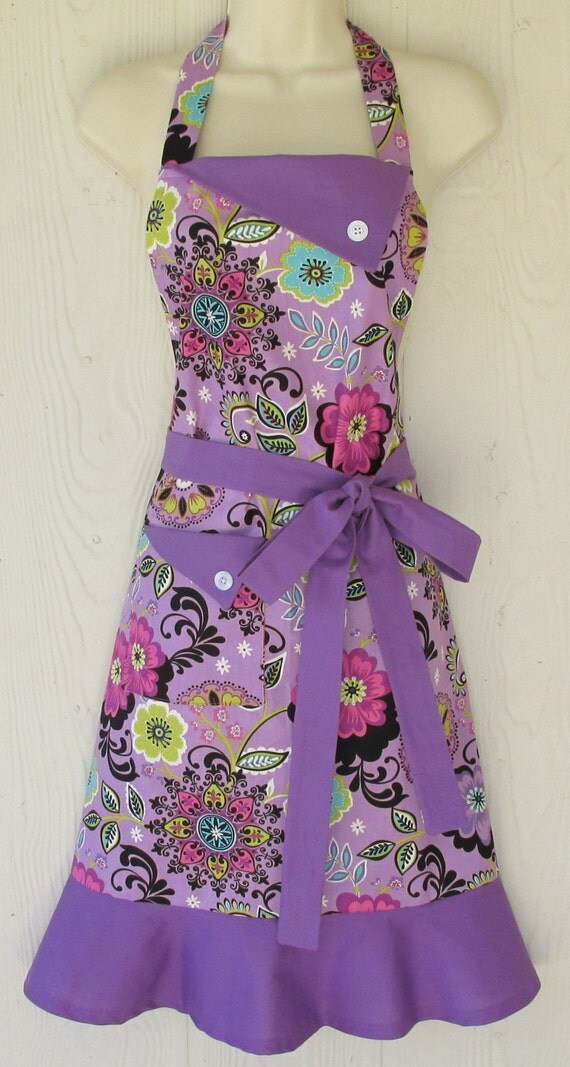
5.  KitschNStyle – After all of the cold weather we’ve had here in New York, I saw this apron and it just says “spring.”  Margaret sells a bunch of fun floral and other patterned aprons.  This apron is homemade and retails for $36.  Margaret’s shop has 122 five-star ratings.

Women's Floral Apron , Retro Style Apron, Full Apron , Orchid Apron, Purple Apron, Flowers , KitschNStyle